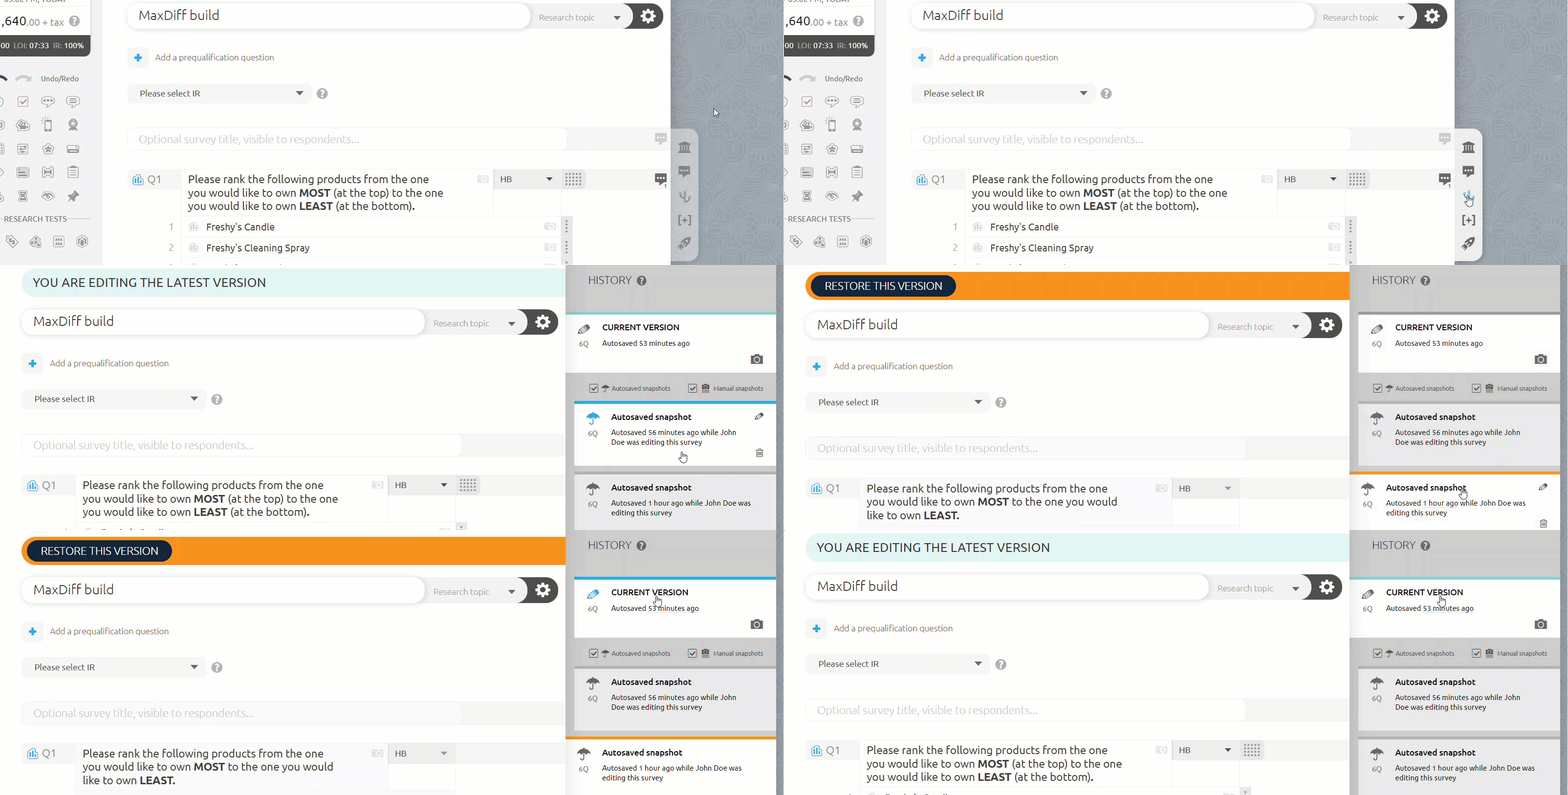
As you edit your survey, Survey History will auto-save snapshots of your survey and you can take a limited number of manual snapshots, dependent on your License level. Snapshots act as restore points in case you need to roll back your survey to a previous version.
- In the Survey Editor page, select the Survey History icon from the Collaboration Tools menu floating on the right side of the page.
- Select an Autosaved version to view, or click the pencil icon next to an Autosaved version to retitle it.
Note: When viewing any version other than the Current version, an orange bar will appear across the top of the page.
- Click the Current version at the top of the page to return to the latest-updated draft.
|
|
- In Survey History, click on the camera icon under the Current Version tab to create a manual snapshot.
Note: The number of manual snapshots available per survey depends on your license level.
- Click the pencil icon to edit the name of the snapshot.
- Click the trashcan icon relative to a snapshot to delete it.
|
|
- Click on any of the saved snapshots, and the system will reload the Survey Editor with a preview of that version.
- With the version you need loaded as preview, click Restore this Version in the orange banner at the top of the page. The system will log that as the current version.
Note: Click the checkboxes to filter by manual or auto snapshots. Click the trashcan icon within a version to delete any snapshot.
|
|
If you have any questions about using Survey History, don't hesitate to reach out!